
Introduction
Your heat press’s temperature has an undeniable contribution to how a DTF transfer would turn out. Hit the ideal heat, and you’ll get consistent and top-notch results. Miss it, and you’re left with adhesive issues and warped designs you can’t even begin to appreciate.
But achieving the correct heat isn’t as simple as pressing a button or two. It’s not a one-fits-all setting; it hinges on several considerations. The substrate, heat press, and film configuration are a few areas you have to consider, along with a few more.
But don’t worry. Here’s a guide to help you set the right temperature for your DTF printing.
DTF Film Type

Have you noticed that one DTF film brand offers distinct sheets than others? It’s because not all films are created equal.
One brand may have a different thickness and composition from another. Sometimes, they also carry varying ink compatibility and adhesive properties. Each of these contributes to the film’s quality and also varies the film’s heat resistance.
With these in mind, you must always refer to the manufacturer’s instructions. This will help you set the ideal temperature and avoid harming the film before you can even begin heat pressing. Most brands have separate temperature recommendations based on their products.
Material Type
The substrate you are using has a lot to say about the right temperature. There’s a specific temperature range required for every fabric. Natural fibers have a higher thermal threshold; hence, they accommodate higher heat. If you use the same heat on synthetics, you’ll only risk melting them.
On top of that, each fabric’s texture influences the transfer dynamics. Some fabrics can accommodate higher temperatures for better bonding. While others facilitate faster transfer, hence their lower temperature setting.
Take, for example, the temperature needed for cotton and polyester printing. The rough cotton surface makes ink absorption more challenging. Meanwhile, polyester has faster absorption and stronger bonding capacity. So, for cotton, you’ll need a longer press at a higher temperature. In contrast, polyester requires less as the ink can easily glue in its fibers.
Refer to this table to identify the right temperature for each fabric:
| FABRIC | CELSIUS | FAHRENHEIT | DURATION |
| Cotton/ canvass | 160 to 165°C | 320 to 329°F | 25 to 30 secs |
| Polyester | 150 to 155°C | 302 to 311°F | 20 to 25 secs |
| Blended | 150 to 155°C | 302 to 311°F | 22 to 27 secs |
| Spandex | 127 to 132°C | 260°F to 270°F | 10 secs |
| Nylon | 150 to 155°C | 300 to 310°F | 5 to 10 sec |
Using A Heat Press
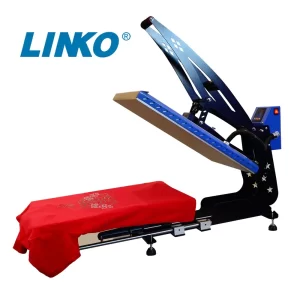
When it comes to heat press, a general temperature range is also observable. Most machine brands recommend setting it between 150-165 degrees Celcius (302-329°F). The press time ranges between 15 to 30 seconds, with medium to firm pressure.
So, always see to it that you follow this configuration. Missing the ideal heat can only lead to subpar print quality. Usually, you can blame the heat press’ wrong setting if you encounter a DTF transfer that won’t stick. It’s either your machine is not hot enough or too hot.
DTF Adhesive Curing
Another area where strict heat setting is vital is the curing of the adhesive powder. Setting the proper curing temperature is equal to applying the right adhesive.
Most of the time, the curing temperature and duration equals that of your heat press setting. You can cure the DTF powder between 150-165 degrees Celcius (302-329°F) for at least 15 seconds. This setting is constant whether you’re using a curing oven or a heat press machine for powder melting.
The same heat and time are necessary for the proper bonding of the adhesive and the ink. That’s why premature curing also yields similar results that premature heat press provides.
Transfer Time
The transfer time also goes hand in hand with your temperature. There are specific pressing times required for every type of fabric, with the heat/time ratio matching. You can’t simply lower the heat and extend the press to compensate for one another.
The usual pressing time starts from at least 15 seconds and reaches 30 seconds. Here’s the specific duration for each type of fabric.
- Cotton: 25 to 30 secs
- Polyester: 20 to 25 secs
- Blended: 22 to 27 secs
Peel Time
As you may well know, there are two types of transfer films based on their peeling time. There’s the cold peel, which is the most common, and the hot peel type.
You may be asking, “how cold should the transfer film be before you could peel it?” The peeling time doesn’t necessarily speak about a specific temperature. Cold peeling means you only have to wait until the film is cold to the touch before you can remove it.
The same goes for a hot peel film. Once you’re done heat pressing it, you must immediately peel it while it’s still hot. The peeling time is also crucial; peeling too early or too late affects the adhesion of the design.
Conclusion
To be successful in DTF printing, you must always emphasize the right temperature for each project. It’s an aspect of DTF transfer that you can’t neglect.
So, before going into work mode, make sure you understand your project requirements. Ensure your temperature is compatible with the fabric, ink, film, and press duration.
The best way to do this is to verify with your manufacturer’s recommendation. Or conduct a series of experiments to find the balanced temperature.